Research conclusion: Serious Games

If you’re interested in some research about ‘serious games’ I’ve posted it in my online work book which includes a project brief, some game analysis, research (academic – sort of) and steps on how I programmed my prototype.  Link to workbook

research-poster-final.jpg

I regret these colours, so, so much.

Blurbs: What is ‘Bright Eyes’?

capture

Promo Blurb:

‘Bright Eyes’ follows the heroes journey of the worlds only survivor of the apocalypse, a child forced to survive in the wasteland mankind created.  Adapt to the world she is forced to adapt to, and watch as it changes her. As you play experience the last of  mankind mold until she is no longer human at all. Experience the end of humans on earth. The 2D puzzle platformer offers a fast paced decision -making environment with quick timed events, player progression and narrative with a quirky and personal art style.  

Developer Blurb:

‘Bright Eyes’ is a 2D puzzle platformer Indie game created in the Unity game engine. The computer game was created for the target audience of artistic and experimental Indie Game. The Aesthetic involves hand painted and cell animated sprites.  The Mechanics involve environmental interaction, shooting and decision making to progress through to the next level. The Dynamics involve resource management, player skill and adaptive learning. 

Narrative Focused Blurb:

Imagine a world created from our biggest fears: Nuclear War, Mutations, Advancement of technology to the point of devastation and the end of the world by our own hand, to name a few. The types of events we fantasize about in popular media but would never want to come to pass. But what of the children born into it? Forced to only see the destruction man kind created and nothing of the world we know now. ‘Bright Eyes’ follows the heroes journey of the worlds only survivor of the apocalypse, a child forced to survive in the wasteland mankind created.  Adapt to the world she is forced to adapt to, and watch as it changes her. As you play experience the last of  mankind mold until she is no longer human at all. Experience the end of humans on earth. 

Academic Blurb:

‘Bright Eyes’ is a research project Video Game artifact that explores the question: ‘How would you use Intrinsic Motivations for Intuitive Play?’ The goal of this artifact to is bridge the gap between intrinsic motivations (a feeling of natural adaption) and intuitive learning. If successful, the project will produce a artifact model for designing naturally intuitive play. 

Game Design

Below will be brief a overview of the pipeline, future goals and intended design for the game.

Aspects Included (detailed descriptions will be added when finalized) :

  • Character
  • World & Narrative
  • Level Design
  • Player Progression
  • Difficulty Balancing
  • Abilities
  • Mechanics
  • Aesthetics
  • Dynamics
  • Obstacles
  • Puzzles
  • Legal Requirements & Ethics
  • Tutorial Design
  • Quests


This blog will carry on from the work created in the ‘Inquiry in Mechanics‘  category.

td.PNG


Game Art

photoshop-training-philippines-course-banner

Below will be brief a overview of the pipeline, future goals and intended design for the games art assets.

Art assets for this Game will be created in Adobe Photoshop.

Aspects Included (detailed descriptions will be added when finalized) :

  • Character animation sprites
  • Intractable object sprites
  • Environment sprites (layers)
  • User Interface sprites
  • Concept Art

Turrent_Wth_Plants.gif

Forest_Assets_Plan.JPG

Artist Spotlight : Loish
 
Lois Van Baarle is a dutch artist/animator currently freelancing in the Netherlands. Her work has always been an inspiration to me and a standard of quality to strive for. 
 
              
                                        Aesthetic Game References
 

Bright Eyes Poster.jpg

Technical Art


powered_by_unity_splash_screen_wallpaper_by_moltenmetalstudios-d7y9gz0

Below will be brief a overview of the pipeline, future goals and intended design for the games Technical Art.

The Technical Art will be created in Unity with the possibility of  using Maya if the need arises.

Aspects Included (detailed descriptions will be added when finalized) :

  • Character Animation
  • Environment Construction
  • Visual Effects and Particle Systems

Further are weekly Updates:

Continue reading

Audio

Adobe-Audition-3-logo

Below will be brief a overview of the pipeline, future goals and intended design for the games audio.

Audio for this Game is yet to be decided. Possibility of hiring an external audio technician.

Programming Overview

$logo-titled

Below will be brief a overview of the pipeline, future goals and intended design for the games programming.

Programming for this Game will be created in mono develop c# in Unity.

Aspects Included (detailed descriptions will be added when finalized) :

  • User Interface
  • Button Inputs
  • Save and Load Data
  • Movement
  • Collection Bars & Pickups
  • Attacks & Health
  • Death & Spawning
  • Environmental Behaviors
  • Level & Difficulty Progression
  • Mechanics (Attack Mechanics Detailed Here)

Scripts so far:

wave-ui  ui-follow-player  spawn-pickup  scoring-system  respawn  player-pickup  player-health player-controllerenemy-wave-spawner  enemy-health  enemy-attack  enemy-ai  camera-movement  abilities


This blog will carry on from the work created in the ‘Inquiry in Mechanics‘  category.

3/10/2016 *The components needed at the moment are specific enemy/environment behavior scripts and save data scripts. 

Scripting and Setup in Unity

For the Scripting I used Unity Default character controller – but changed the script so that it would work for my chosen inputs.

The controlls are set as:

  • W – Run Forward
  • A & D – move Left and Right
  • Hold Shift – walk
  • E – Shoot

Animation Controllers in Unity

Capture10.JPG

Goals

Create an animation controller for the player, blending animations together and creating realistic transitions.

Technique

Technique one: As above, create a transition from entry to Idle, then make transitions from other states. This technique worked but gave me less control over the transitions.

Technique two: As below, create a transition from entry to a Blend Tree. This allowed me to keep track of the amount of ‘turn’ and ‘forward’ motions the inputs are receiving. By doing this I was able to add turning motions to the movement by triggering different moments in the animations where it would (luckily) tilt to one side. The numbers represent the amount of movement on X and Y plus the speed.

Capture11.JPG

Then all I needed to do was trigger the animations through code. (The shooting/force is the same deal.)

Reflection

Blend tree was a headache. I can’t talk about it reflectively if only to say i’m glad I never have to learn that again.

Post-Mortem

Naming the original data clips with giant naming conventions was a terrible idea as it wasn’t able to be changed in Unity. Also unfortunately the blend tree options only allow you to use forward and turning motions – so I was unable to add a backwards walk which would have been easy enough to do if it had. I was never able to figure out how to implement the backwards walk so I had to scrap it. I also lost the Heavy Breathing Data somewhere along the line, but it didn’t fit well with the structure anyway. From this point it was clear that the game had a ‘soft’ aesthetic as apposed to and ‘action’ one. I never intended a specific one,  but I am happy with the results.

Importing to Unity

Capture08.JPG

Goals

Create a working prefab of edited animations in Unity

Technique

  • Change the Rig settings to Humanoid
  • Adapt the animation settings per movement – whether the Root transformation follows the player (cycles) or stay centre of the model (stationary movement.) Capture09.JPG
  • Adjust the key frames and Timelines so the animation loops properly. If the steps don’t match up Unity tries to blend them together – it ends up looking like a weird limp if it’s off. Above is an example of a Idle Movement.

Reflection

It took a while to understand the settings, but looking at Unity Sample Assets allowed me to unravel the character animation system enough to understand it by looking at one of their characters. This process reminded me of the importance of even steps in the walk/run cycles.

Post-Mortem

The Raw Mocap Data Footage didn’t capture enough steps for the cycles to be perfect. Also the ‘force’ clips were especially difficult because they were hardly symmetrical. In future I would make the actress stop and start in similar poses.


Mocap Data to Maya Skeleton

Capture04.JPG

Goals

To create a working model to import into Unity with the Model, Animations, and Bones/Rig attached.

Technique

My first technique was to follow the 002_Retargeting_to_Maya_character.pdf, and use animation layers in Maya to edit the animations. Unfortunately after animating a fair few rigs I tried importing to Unity and it became deformed. The animations worked but I couldn’t attach the animation to any other models and it always deformed any models attached.

Capture06.JPG

Model exported with Animation and Rig in Unity^

Capture05.JPG

FBX Export of Model in Unity^

The second technique I tried was to skip the animation layers in Maya and move onto 003_Mocap to Maya skeleton.pdf. Steps:

  • Import Model and characterize skeleton in Motion Builder
  • Merge the Solved Data to the scene
  • In the Character Controls window select Actor from the Source drop-down menu
  • Re-size the models to fit each other
  • Bake to Skeleton

Capture07.JPG

Reflection

It’s a real shame I didn’t figure out how to get the edited animations into Unity, but this did allow me to move into Unity faster which is a software i’m much more comfortable with. Learning Motion Builder and Maya in such a small frame of time was a challenge.

Post-Mortem

Taking out the animation layers made it difficult to get balanced and smooth walk/run cycles. Fortunately Unity had options to cut up the key frames and blend them together – it was just a lengthy process and probably would have been quicker with a edited animation in Maya.

After watching this issue pop up a few times with other students I realized it was the compatibility that was wrong with the import. The model imported and the saved Maya animation changes were in different locations and scales, so unity tried to put them together and it failed. I’m still not sure how i’d fix this issue,  I don’t know Maya enough to  have a clue where i’d change the scale and locations on import but i’m almost certain that was the cause.

Solving Mocap Data in MotionBuilder

Capture03.JPG

Goals

To transfer the cleaned up Data from Cortex to Motion Builder and apply it to a model.

Technique

  • File>Motion File Import
  • Attach Character Actor to the Data Points and Scale to Fit using, Scale, Rotate and Position.
  • (View>Orthographic>Producer Front etc.)
  • Re-target the Mocap Markers to the Different Parts of the Actor body

Reflection

Having many different takes really hindered the process. Re-targeting the Mocap Markers was tedious to do 8 times in a row. I was at first unsure how close to the markers the actor had to be, but after trial and error I eventually picked up the best technique for the models shape.

Post-Mortem

The final walk ended up with the feet curling inwards- I tried to change that in this stage but it still stuck. I think the live actress was walking uncomfortably in the mocap suit on her feet – I remember her mentioning it a couple times. The character -actor in Motion Builder also didn’t quite fit right with the Maya model. A model designed specifically to match the live actress could have fixed a lot of issues I had.

Post Processing in Cortex

Capture13.JPG

Goals

Use Cortex to prepare/clean the Motion Capture Data for Motion Builder.

Technique

  • Select individual markers in the left hand Markers window where they are listed from top to bottom.Select a marker in the 3D view window, and its XYZ animation curves appear in the graph window.
  • Identify unnamed markers and fill gaps where markers have disappeared.
  • Fill any gaps using Cubic Join for small gaps (a few frames), and Virtual Join for larger gaps.
  • Smooth the data where necessary.

Reflection

The process was a lot more user-friendly than I expected. The pdfs were great and easy to understand.

Post-Mortem

I wish I had remembered to Record this process, as the Cortex software wasn’t always available.

Capturing The Data

Capture02_edited.jpg

Goals

To capture the Motion Capture Data, having the actor:

  • Walk Slow
  • Walk Fast
  • Jog
  • Sprint
  • Stand Idle
  • Look fatigued
  • Walk Backwards
  • Throw some kind of force with her hands

Technique

I instructed the actor to keep her back straight, head up and to ensure her steps are as even as possible. For the force movements I demonstrated the movements and even let her physically push me around to get the effect.

Capture02

Reflection

It was my first time working in the Mocap Suite and it had been a while since an assignment had pushed me out of my comfort zone. I have never been a good actor or animator – but keeping in mind the end in-game result helped me focus on the type of movement I needed. I felt like it was easier, and more fun than I expected. The facility’s  at AUT for motion capture are incredible, I’d defiantly want to do it again.

 Post-Mortem

After completing the project I realized a giant list of things I did wrong at this point. I should have analysed other player controllers in game engines to know what I need to capture. I was missing small things like slight turns that would have been easy enough to capture. If I were to do it again I would have the actor walk/run/jog in a straight line and in a cycle. Then I would be able to create a more convincing turn in-game. I would also stop them from walking out of the capture area – as that caused a lot of headache.

Week 11

This week I play tested the game and implimented changes from new research I had recently looked into. A Gamasutra Article …………. talks about Blizzards Diablo II and the resource management mechanics they’ve implimented. Their goals are similar to mine where they have the players balance mana, skill and health. The article states about those mechanics “Not only does managing these resources form a very natural pace to the combat, an attack-and-retreat flow that becomes more apparent the longer the game goes on, it also creates a constant feeling of “almost there”, such that players will always feel wanting for something, whether that’s more health, more mana to use a skill, or for a cooldown to end.  It’s an emotional state which is only ever resolved once battle is over and the enemies are dead, but resumes as soon as the player moves on.”

That comment had me thinking about how I can use the mechanic to achieve a similar effect.  To achieve this I manipulated the spwan times of the resources vs the regeneration of the players health. I wanted the player to experiance that ‘almost there’ feeling in play. So when the player is on one side of the area – they will be forced to move to the other side.  In doing so they have have to spend a certain amount of time being very vulnerable to death, and this is being designed to happen many times in one game. In doing this the player has to push and concentrate harder in the game every 5-10 seconds (roughly) and my goal in this is create less linear play.

To hopefully compliment these new ideas, this week I also worked on the visual feedback off the game. I added subtle colour changes, effects and animations to give the player a more satisfying attack and damage.

Hopefully over the next coulpe of weeks I can further develop these ideas further to help deliver my game with a strong feeling of sacrifice in the mechanics.


Week 10 – Converting to Final Concept


  • I started by doing 2D plat former tutorials on YouTube to learn the difference between 3D and 2D scripts. Brackeys was the most helpful Channel, I stuck to these tutorials and used the provided assets for placeholders while I converted my scene to 2D.

This slideshow requires JavaScript.

  • Then I created my own assets and built a simple game prototype (still using the character, enemy and pick-up Brackeys placeholders.

This slideshow requires JavaScript.

  • Next I continuously play-tested and re-designed the game until it was up to a good play-testing standard. I’m still using the placeholder character and enemy’s for now – but the mechanics and game itself.

This slideshow requires JavaScript.

Week 09

This week was a huge challenge. Somehow a computer corrupted my files and I kept opening my back up projects on that same computer (regrettably.) It affected my project settings and UI – and took hours to fix.

Now after creating millions of back-ups I have a completed working build (for real this time.) I plan to play-test next week, and kept updating the game so that it gets closer to answering my question about meaning and mechanics.

This week’s play-testing and build vid

Week 08

This week I developed a more detailed methodology on my Report, and made sure all the bugs were fixed in my mechanics. Now all these problems have been fixed and I can finally start testing

  • Health needs to regenerate 
  • Gun needs to stop firing when the player is out of resources 
  • Feedback and Art needs to be more presentable 
  • Spawn Points for enemy and resources


Week 07

Working 3D Prototype

Capture.PNG

[Done] [Yet to Do]

Power A: Spacebar

  • High Damage is being made to the Enemy, and low damage to self.
  • Medium Damage is being made to the Enemy, and resources are being used.

Power B:  Left Mouse Click

  • Medium Damage is being made to the Enemy, and resources are being used.
  • Enemy is being forced backwards.

Power C: Right Mouse Click

  • High Damage being made to the Enemy, and low damage to self.
  • Enemy is being forced backwards.

Current Bugs:

  • Health needs to regenerate 
  • Gun needs to stop firing when the player is out of resources 
  • Feedback and Art needs to be more presentable 
  • Spawn Points for enemy and resources

Capture

Things to consider when play-testing:

  • Amount of High Damage to the Enemy/Player
  • Player Health Increase over time
  • Amount of Player starting Health
  • Amount of Player starting Resources
  • Amount of Resources Available to the player
  • Environmental Factors
  • Amount of Medium Damage to Enemy/Player
  • Longer Fire Rate – Positives to game-play (stagger?)
  • Is there a cool down for the longer fire rate?

Balancing Rundown.JPG

^^ Prototype Video

Professional Practice

Quantum Break – The Facts and Fiction of Time Travel

Week 06

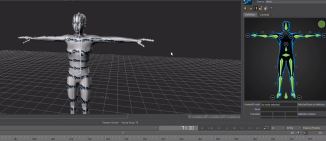
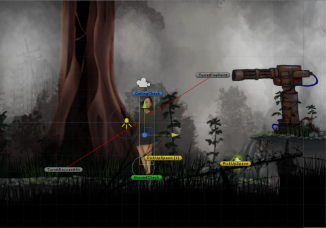
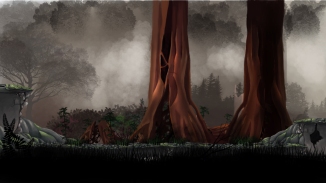
This week I opened Unity and started putting together a placeholder environment using tutorials  in order to test out the mechanic.

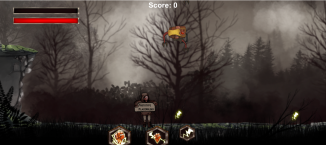
I completed Unity’s Survival Shooter tutorial in order to learn more about how multiple scripts work together in a project.

CaptureUnityWeb.JPG

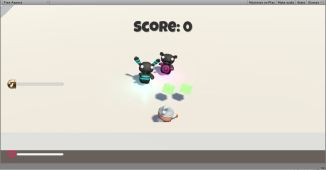
After completing I tried to alter the scripts in order to work my mechanic into the game. The idea was that instead of having the player just shoot with one input, I would make the player shoot in the three different ways, each damaging the enemies and the player in their own unique way. It took a while of messy note-taking and focus but I eventually worked out a plan of action.

(example of messy notes & trying to make sense of everything (there’s plenty more) )20160407_185757.jpg

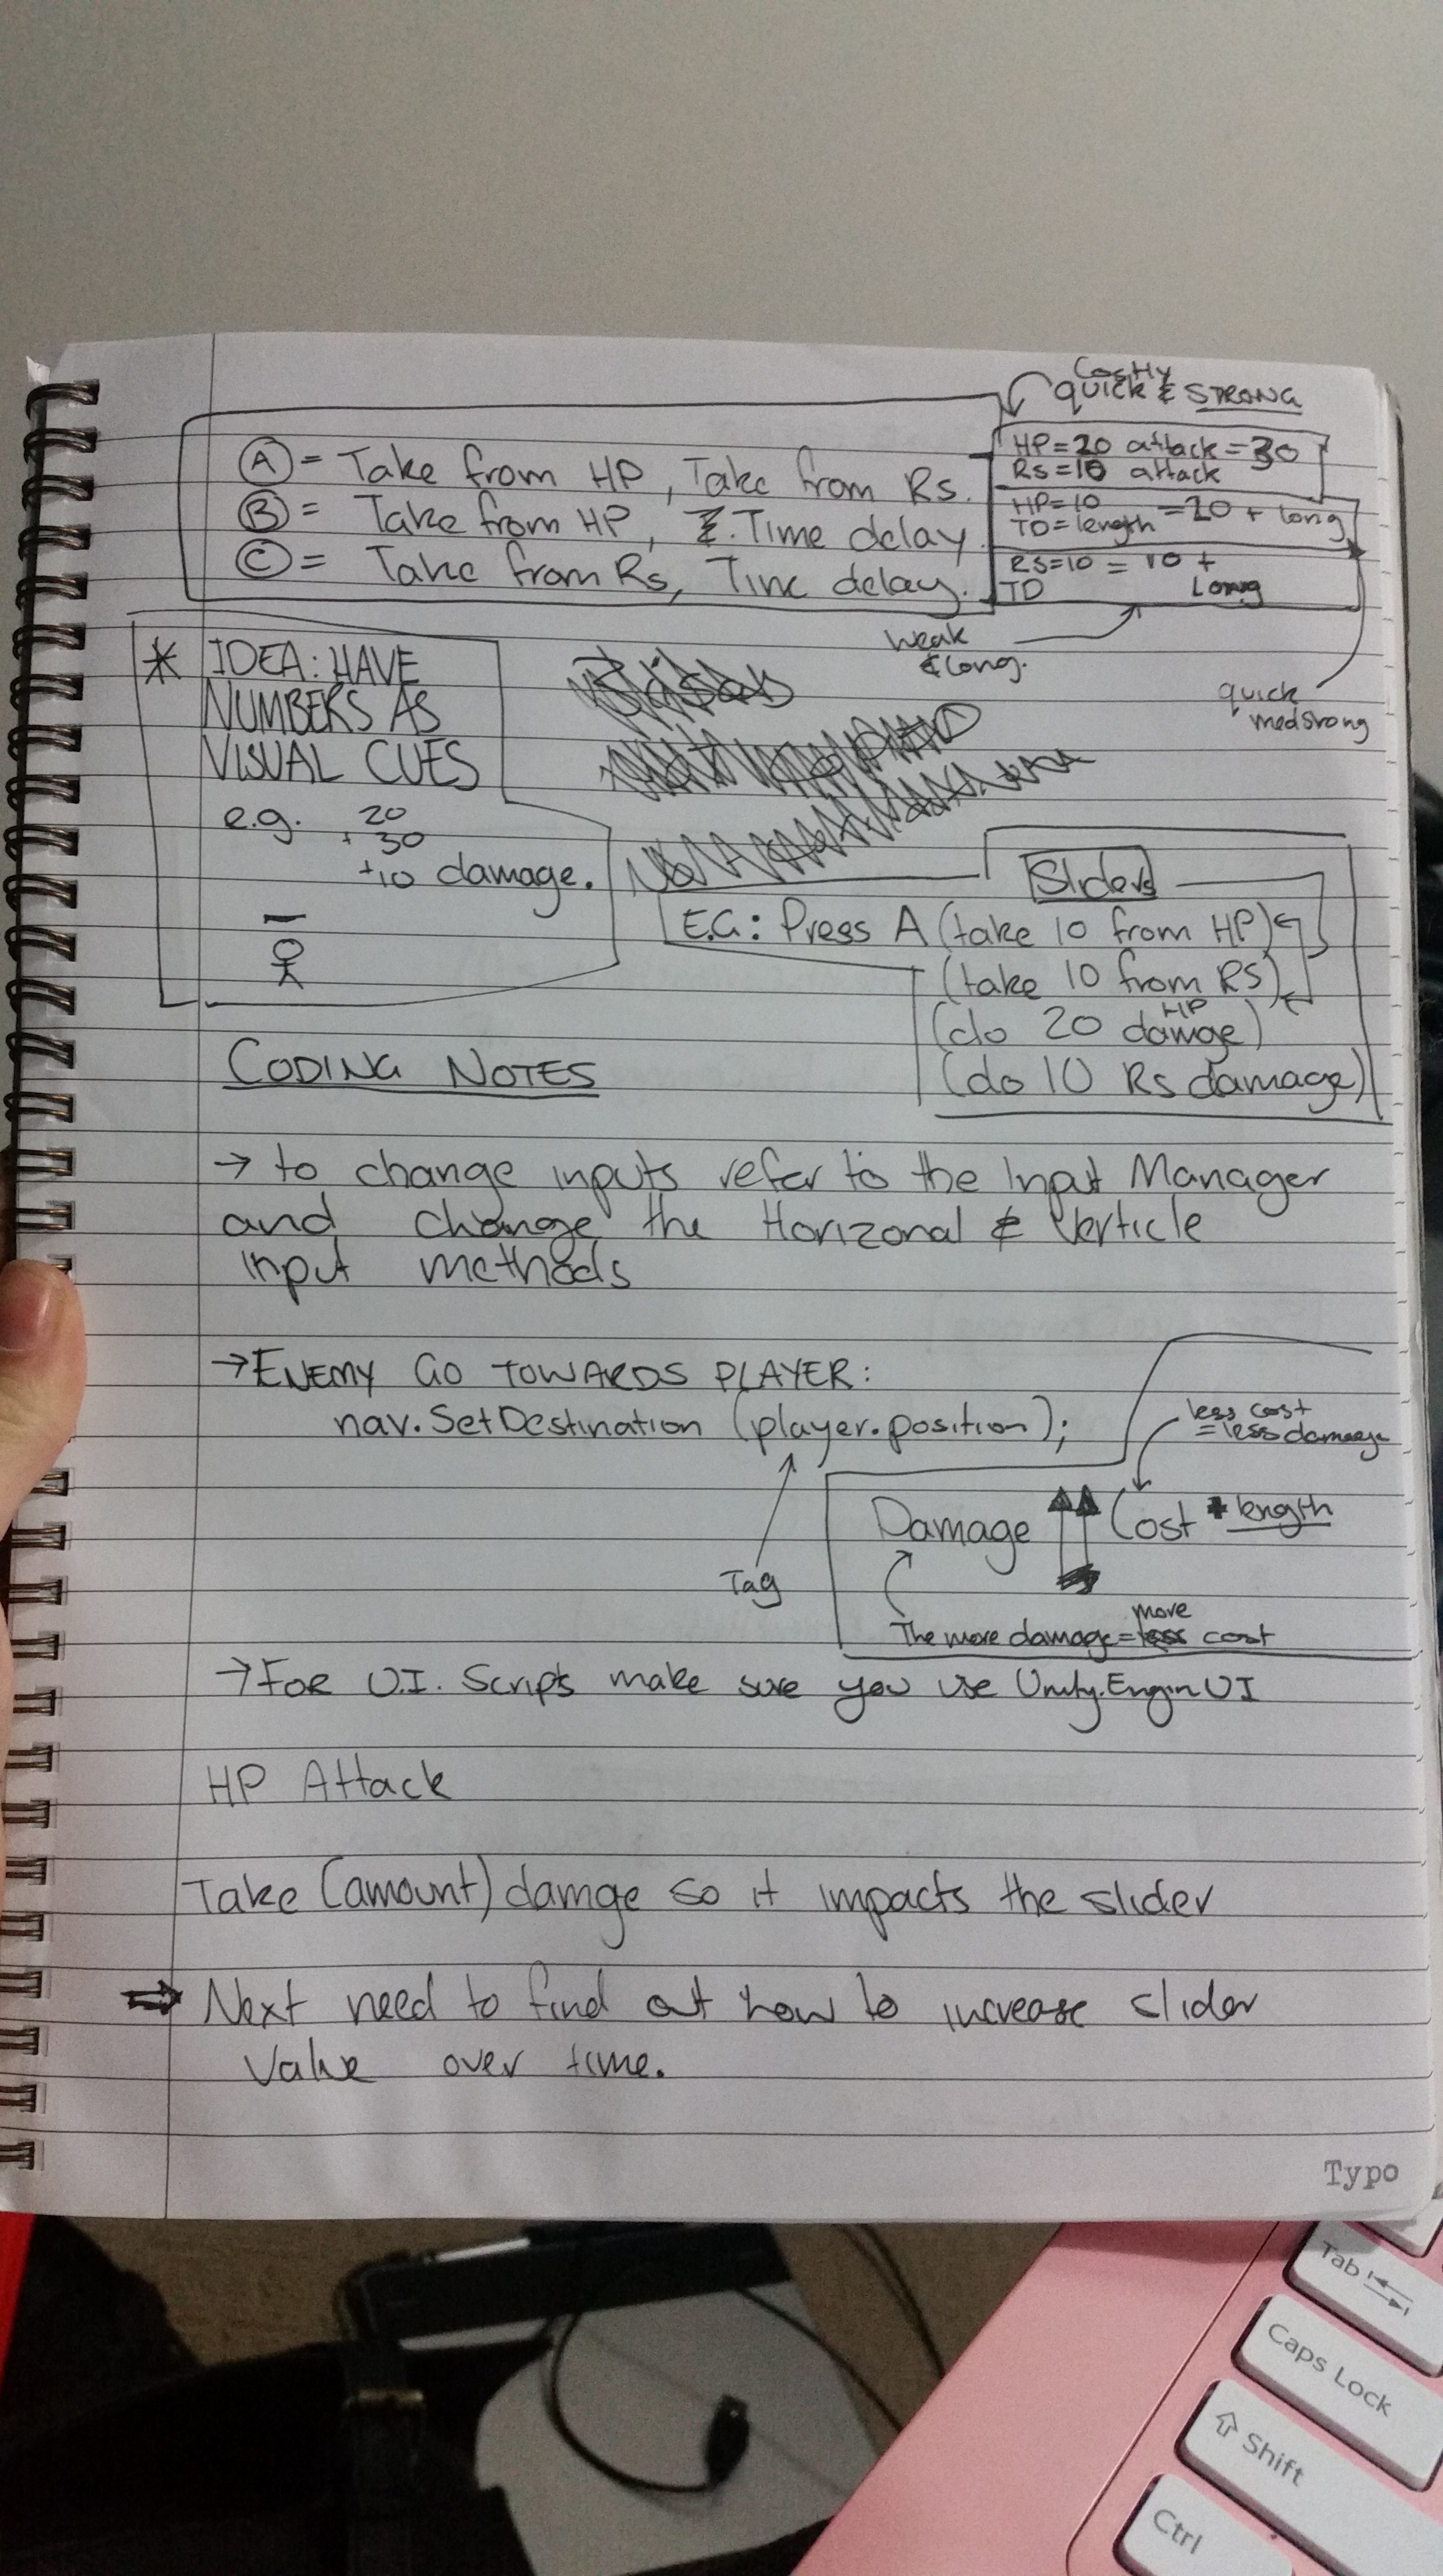
At this stage, my primary focus was to add the ‘sacrifices’  to the shooting, which in hindsight seemed like an easy task that turned out to be at best a learning curve.

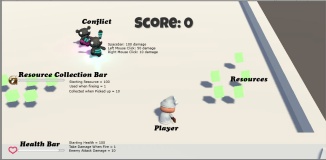
To briefly explain how it’s going to work:

Using your players Health will give you +20 attack damage

Using your players Resources will give you +10 attack damage

Using your players ‘Time’ will give you a longer attack time

Power A  will have:

  • +30 damage to enemies
  • -10 PlayerHealth
  • -20 PlayerResources
  • (no time bonus)

Power B will have:

  • +20 damage to enemies
  • + 10(ish) sec attack
  • – 10 PlayerHealth
  • (no resource bonus)

Power C will have:

  • +10 damage to enemies
  • + 10(ish) sec attack
  • – PlayerResources
  • (no strength bonus)

Starting with Power A I tried to implement a new line of code that when the player is shooting it will deduct a ‘SacrificeDamage’ to the players health.

It looks like this:

Public int SacrificeDamage = 10;

Void SacrificeDamage()

If  (playerHealth.currentHealth>0)

playerHealth.TakeDamage(SacrificeDamage);

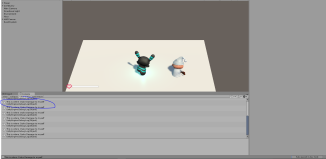
I’m confident that I can put the mechanic together for testing, I just came across a large amount of compile errors while learning everything. My main obstruction in just physically intergrading the scripts properly. (Hopefully, on Friday I can make it all work together – i’m getting close)

This week  I also started to put together my literature review with a couple of paragraphs done.

Professional Practice

This week I attended the NZGDA meetup. The GDC talk was inspiring, and set forth my goals of going to it next year.

20160406_181912.jpg

Because of the talk, I went home and looked at the GDC vault watched three videos. Farah’s Diversity panel, A seminar about portfolio building and a woman in games seminar.


Week 5 Reflection

Discussing idea feedback:

User Interface:

Feedback on the mechanic was unanimous, from the three people I discussed the idea with – all said that User-Interface would be very important in  understanding the mechanic. One suggested that I try prototyping with and without User Interface and the effects on game play.

Controls:

It was suggested that using combined and multi-gesture button pushing might make the mechanic easier to comprehend.

Comprehension and Communication:

Initially I thought of the mechanic working as each button being represented as”A+B-C,” instead, it was recommended that I communicate each button/action as just “-C.” So instead of telling the player they have three resources minus one, its being told as you are not able to use this one thing. If that makes sense.. I’ll come back to this.

Object:

It was suggested that the object that the mechanic is interacting with should compliment the meaning portrayed. Looking into semiotics and representation in everyday objects can achieve this.

Conclusion:

Over-all the feedback suggested that the mechanic can work, but needs to be clearly and carefully communicated to the player. Through prototyping from now on, I can find the most effective and least intrusive way of presenting my mechanic and its meaning.


Week 05


This week involved a lot of brainstorming and reading, I designed and started to evaluate my idea. Hopefully, this class can give me and insight to whether I am on the right track. I also added all my sources to Zotero, and I’m ready to share.

Project-triangle-en.svg

I decided I wanted to represent the idea of the ‘project triangle’ (example above) within a game mechanic.

My idea is that the player will have three resources, but can only use two at a time. The player must  decide based on the context which resources to sacrifice over the other.

This within the game will hopefully have the player thinking strongly about what they can afford to use, and of which they should savior.

For example time, currency, or strength.


Week 04

This week I started working towards collecting readings for this project, so far I have:

  • Fabricatore, C. (2007). Gameplay and Game Mechanics Design: A Key to Quality in Video Games. OECD Expert Meeting on Videogames and Education, 29–31.
  • Fabricatore, C., Nussbaum, M., & Rosas, R. (n.d.). Playability in Action Videogames: A Qualitative Design Model. Human–Computer Interaction, 17(4), 311–368.
  • Kress, G., & van Leeuwen, T. (2001). Multimodal discourse : the modes and media of contemporary communication. London: Arnold.
  • Malone, T. W., & Lepper, M. R. (1987). Making Learning Fun: A Taxonomy of Intrinsic Motivations for Learning. Aptitude, Learning and Instruction, 3, 223 – 249.
  • Salen, K., & Zimmerman, E. (2004). Rules of Play – Game Design Fundamentals. Massachusetts London, England: The MIT Press Cambridge. Retrieved from https://gamifique.files.wordpress.com/2011/11/1-rules-of-play-game-design-fundamentals.pdf
  • Swink, S. (2009). Game Feel: A Game Designers Guide to Visual Sensation. Burlington: Elsevier Inc. Retrieved from https://gamifique.files.wordpress.com/2011/11/2-game-feel.pdf


The plan was to write an annotated bibliography for each of them – but that fell through with the amount of reading I could do in a week.

In a summary of what I’ve found from reading through as much as I can:

‘Greater Meaning’ in games is shaped by not only what the player is physically doing or sees but also the context in which the player is provided. Also, prior beliefs and knowledge from the player themselves will shape the meaning.

Two of these readings (Making Learning Fun: A Taxonomy of Intrinsic Motivations for Learning. Aptitude and Playability in Action Videogames: A Qualitative Design Model)  are study-based researched conducted with educational goals and entertainment goals, their findings on communication with the player will be helpful to my research – although they more provide design guidelines rather than answer any questions.

Rules of Play was helpful in understanding meaningful play, and Game Feel gives examples of how communication can be most effectively be made with a player and why.

Multimodal discourse is a new finding, and one of the books outside of ludology that I want to explore for this project. That book in particular talks about semiotics.

Week 03 Reflection

By simplifying my slides I found when talking that the presentation can come across as lacking. In presentation (mostly due to my illness this week) and in content. I’m not entirely sure how to present the project as a whole, I have ideas on what mechanics I want to use and how to represent them but I can’t say what it’s going to look like as a whole until I’ve activity read through all the sources I possibly can in order to create the best possible result – to a point. This week I dove into play testing a random idea and I admit that may have been the messiest way of doing it.

For next week I plan to start with Zotero to collect, read and record ideas to send me on the right path. Then the following week I can start prototyping and play-testing while still activity reading.

I need more enthusiasm in my project as well. A system that is so strict and in a way a representation of a set of ‘rules’  like Mechanics to me at first seems un-appealing, but when adding the idea of greater meaning and almost being able to mold it into a type of Art-form is something i’m extremely interested in.

Week 03

This week to get an idea of how this project is sort of going to plan out I came up with a quick complicated mechanic that would be designed for a Video Game and tried to transform it into a paper prototype as a test. It went horribly, but I learnt why which can help me create a better approach or way of thinking for next time.

Basically I tried to make a multi choice mechanic about sacrifice of one type of resource. (I tested it out on a digital design student i’d never met before.) I found that because she couldn’t see the logic or relate to the logic behind it she became confused.So in future i’ll make sure that my representation is universal and not something only I’d be able to understand.

Here’s the link to the Paper Prototype:

https://popapp.in/projects/56e7a579e06fadee1a0fca27/preview

Presentation Reflection 01

Pecha Kucha Presentation Week 01 – 02

Week 01

Although initially I wanted to create an Art-Based Brief, after reading the assigned Rules of Play – the chapter about design and  the one about interactivity I was inspired to investigate Game Mechanics.

I found a couple readings that will help with research and added them to my slides with a quote from Rules and Play.

This update is late due not reading over the tasks efficiently, I plan to take more care in the Future.

Week 02

Reflection

In creating my presentation, I  developed ideas of a more academic based project for the semester. Although I was wary of heading in a more research based direction – after supportive feedback and revisiting the learning outcomes I found more confidence in my ideas. I also learnt the value of Academic Readings over analysis and found a better (/accurate) understanding of Methodology.

**Note** I investigated Zotero and watched the Video, I was unable to install and create an account due to severe headaches limiting the amount of work I could do this week.

To make my presentation more concise,

Context:

  • Inquiry in Game Mechanics
  • Representation in Game Mechanics
  • Adapting same Game Mechanic Representation for different mediums e.g. Video Games, Board Games, Paper prototype

I know my investigation forms around the investigation of game mechanics, specifically finding greater meaning in them – but is this context? (A question to investigate further) 

Content:

  • A developed  game mechanic representing greater meaning to players
  • A research poster exhibiting the research behind the Mechanic

Methodology:

  • High impact academic readings and research about Greater Meaning in Mechanics
  • Cross-disciplinary prototype play testing with University Students


The Definition of Terms

This week I researched different commonly used terms used in the study of game design and game development. The task was to find two different meanings to commonly used terms that are often differently viewed between different people, and then define them myself. I found Chris Crawford’s writing ‘The Art of Computer Game Design’ the most relatable of all the sources I looked at. He himself understands that in order to understand games and game design, you must determine what the word ‘game’ means (Crawford, 1982). From his writing and others (which I will mention shortly) I was able to recognise my own interpretation of these terms.

Continue reading

NZGDA – 7/10/15 – Game Design

This month at the meeting we discussed game design with the creator of Tallowmere. I enjoyed the presentation and how honest he was about his process. The one mechanic in the game that stood about to me by a mile was the integration of  player choice with the difficulty. Instead of adding level choices at the start (easy, medium, hard etc) he added a pile of kittens that you have to sacrifice in order to be stronger. I thought that mechanic was what made the game really stand out and become something i’d like to play. In my opinion a simple creative and unique mechanic like that is what takes a game from being average – to being great.

Continue reading

Women in Games


I attended the NZGDC 2015, and learnt so much about the industry. With speaking to Dean Hall – meeting people from studios and the talks, I feel like it was a great benefit and I was glad I could go. I spent most of the time listening to the design talks – although I thought I’d be interesting in the indie and art talks, design was the most interesting to me. I found a passion for level and UI design that I never had before – which is great.  I feel these events are encouraging more and more of my passion for game design every time I go. I also got to learn more about the UI for Into the Dead – a mobile game I really loved before I even knew it was a NZ made game.

12046826_10205480696636938_3975319014200493044_n

Continue reading

Chris Crawford on Interactive Storytelling

Artists and engineers as cats and dogs: implications for interactive storytelling.

I choose to look into this chapter as collaborating with other artists and developers is something I’m coming across more and more as the years go on.

Crawford states clearly the divide between programmers and artists and how it needs to be resolved in order to achieve a good story. In order to do this he says that programmers or engineers must make a solid effort to create tool for the artists that meets their needs. It also helps to learn some of the artists terminology. Artists must learn the basics of algebra, and must coherently express their needs to the engineers. Most importantly the artists and engineers must have mutual respect for each other.

ANALYZING THE RESULTS

How can we analyze the experiential outcomes to inform your practice or measure it’s success? I want to know if people playing the game can pick up the gameplay from the start. If they don’t understand what they have to do within the short time they’re playing it then it won’t be an engaging experience.We can find this out by playtesting vigorously with people who aren’t aware of what the mechanics are. It’s a short time-frame people will be playing so we want them to pick it up as soon as they start.

Output Reflection – I am the Rivers

This week my task was to ‘Create chosen trees in 3D using the low poly style from style sheet’.

I basically looked at the style sheet and started to grasp an idea of how its suppose to look, then started a couple trial models to see what I could come up with. I also wanted to make sure I address any technical issues before the deadlines creep up.

  • I was able to explore the different styles of low poly in order to refine a distinctive design.
  • The ideas I had are different to my groups, I need to change my modelling style direction.
  • Communication may be a big hurdle, the ideas getting across clearly and whether technically I can create from these ideas.

Continue reading

Creating a Digital Environment in Unity3D for Virtual Reality: Research

I’ll continue to update this post with info as I find it, but for now:

This blog post has been helpful in learning what i’m going up against:

http://blogs.brandeis.edu/teaching/2014/09/18/getting-started-with-virtual-reality-development-in-unity3d/

These Youtube tutorials really help me grasp environment making in Unity and also learning the new updates with the transition to Unity 5.

Continue reading

Kiwi Jam 2015

We made a game called ‘Throw Your Face Off’, and ice-cream capture the flag shooter. We’re going to keep working on it and refining it. I mainly focused on the game and environment design.

It was a group of three of us. I focused on the design and map. It was the first time i’d ever attempted 3D modeling and I really learnt so much having been given such a small time frame to learn a whole new software.

Among that I also got to meet so many interesting new people and share ideas about games. It was a very rewarding experience and I can’t wait to do it again.
001

002

Bjorn Hurri

Home

“I love to create worlds, regardless of what that world is.”

Bjorn Hurri is a well respected lead concept artist working on games such as Bioshock Infinite, Dead Space 2, Army of Two:Devils Cartel and Sniper Ghost Warrior 2 plus many more. His works are inspiriting. Watching a lecture online about him I really thought that documenting the key advice he gives would be well worth it:

“You need Imagination and Really interesting ideas to pursue. Make sure the game is very interesting to experience. Learn traditional aspects of drawing art, Creating models drawing with pencils or painting is the foundation that’s extremely important because when you do understand that foundation you can apply that to anything regardless of tools.”

Why Games and Learning?

Over the course of this assignment I did the most research I possibly could in the time given – and I enjoyed it. Doris C. Rusch in my opinion is right when she says that games need deeper meanings. We’re past the point where games can just be used for entertainment, games are used every day on trains, walking down the street, at home, even sometimes at work, and they hold so must potential to be more than they are and make a positive difference. I’m not talking about advertisements, or in-your-face learning, but intelligently and creatively inter-grading a deeper purpose in games for the good of many. This is a link to all my research so far on ‘serious games’ and game based learning. I’d advise you to have a look if you’re interested.

https://krystalgamedev.wordpress.com/category/academic-research/

Continue reading

Using Twine Intro + Variables

I want to learn how to create a simple web browser game. Finding Twine I discovered a away to play with html that isn’t too complicated as I have 2 Weeks to work with it.

Following the tutorials by user VegetarianZombie on YouTube, I’ve created a demo game following his narrative.

The aim is just to follow along, and learn how to create so that I can apply this to my own work.

Continue reading

Town Building

This is a simplified video of how I created the houses for the towns, looking at the time stamps it took me around 3-4 hours for each house depending on the size and objects within it. Created in Photoshop Elements 10 with a wabcom.